How to set up Shopify's New Customer Accounts?
Shopify's New Customer Accounts replace the traditional email/password login with a passwordless system. Instead of creating a password, customers receive a 6-digit verification code by email each time they sign in. This guide walks you through enabling this feature for your mobile app.
Prerequisites
Make sure that New Customer Accounts are enabled in your Shopify admin panel (Settings > Customer accounts). If your store still uses classic accounts, you need to switch before proceeding.
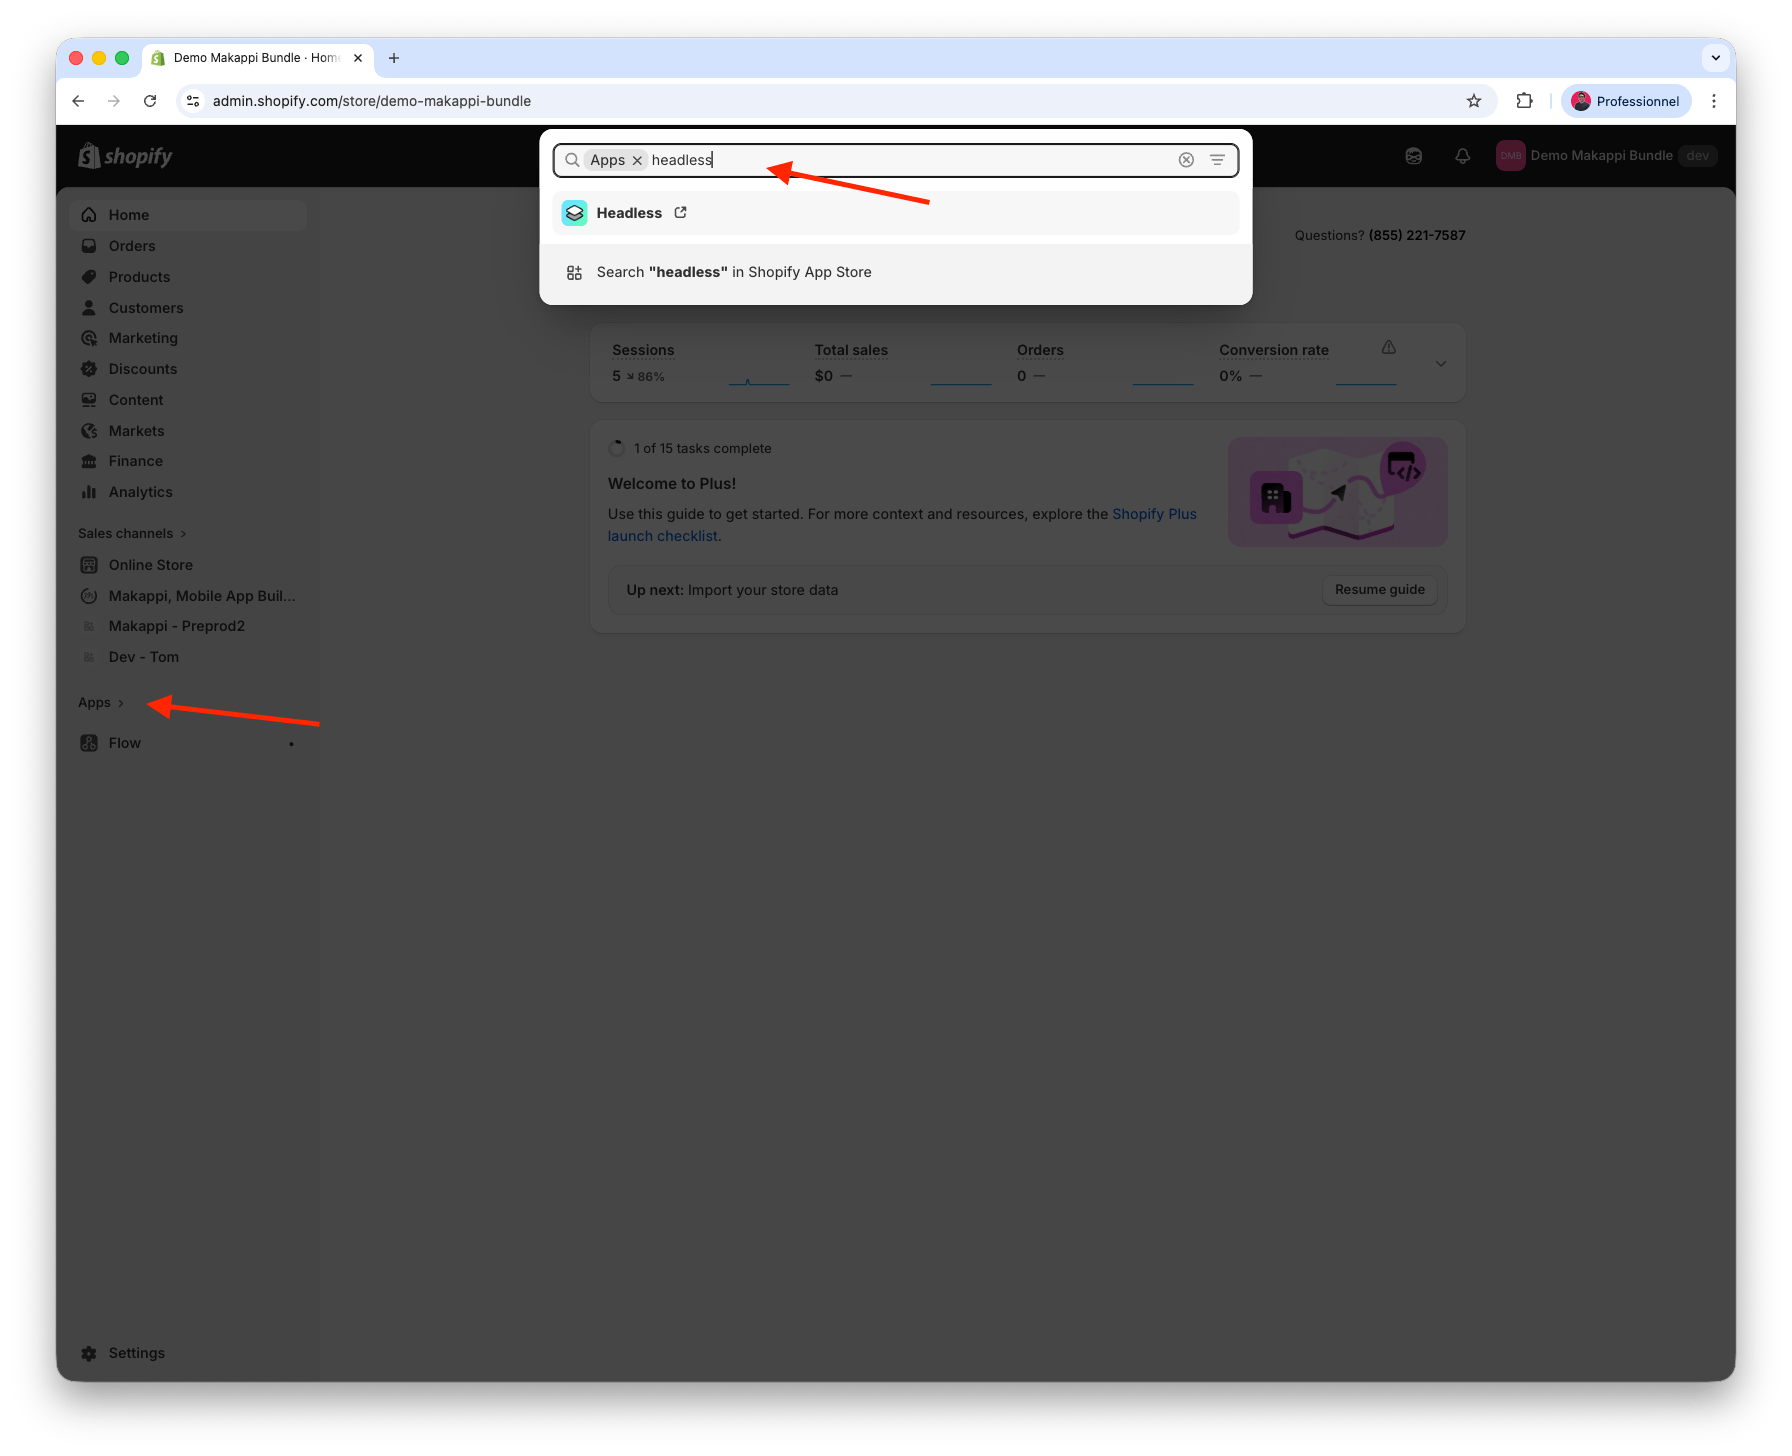
Step 1: Install the Shopify Headless app
- Install the official Headless channel directly from the Shopify App Store: Install Headless
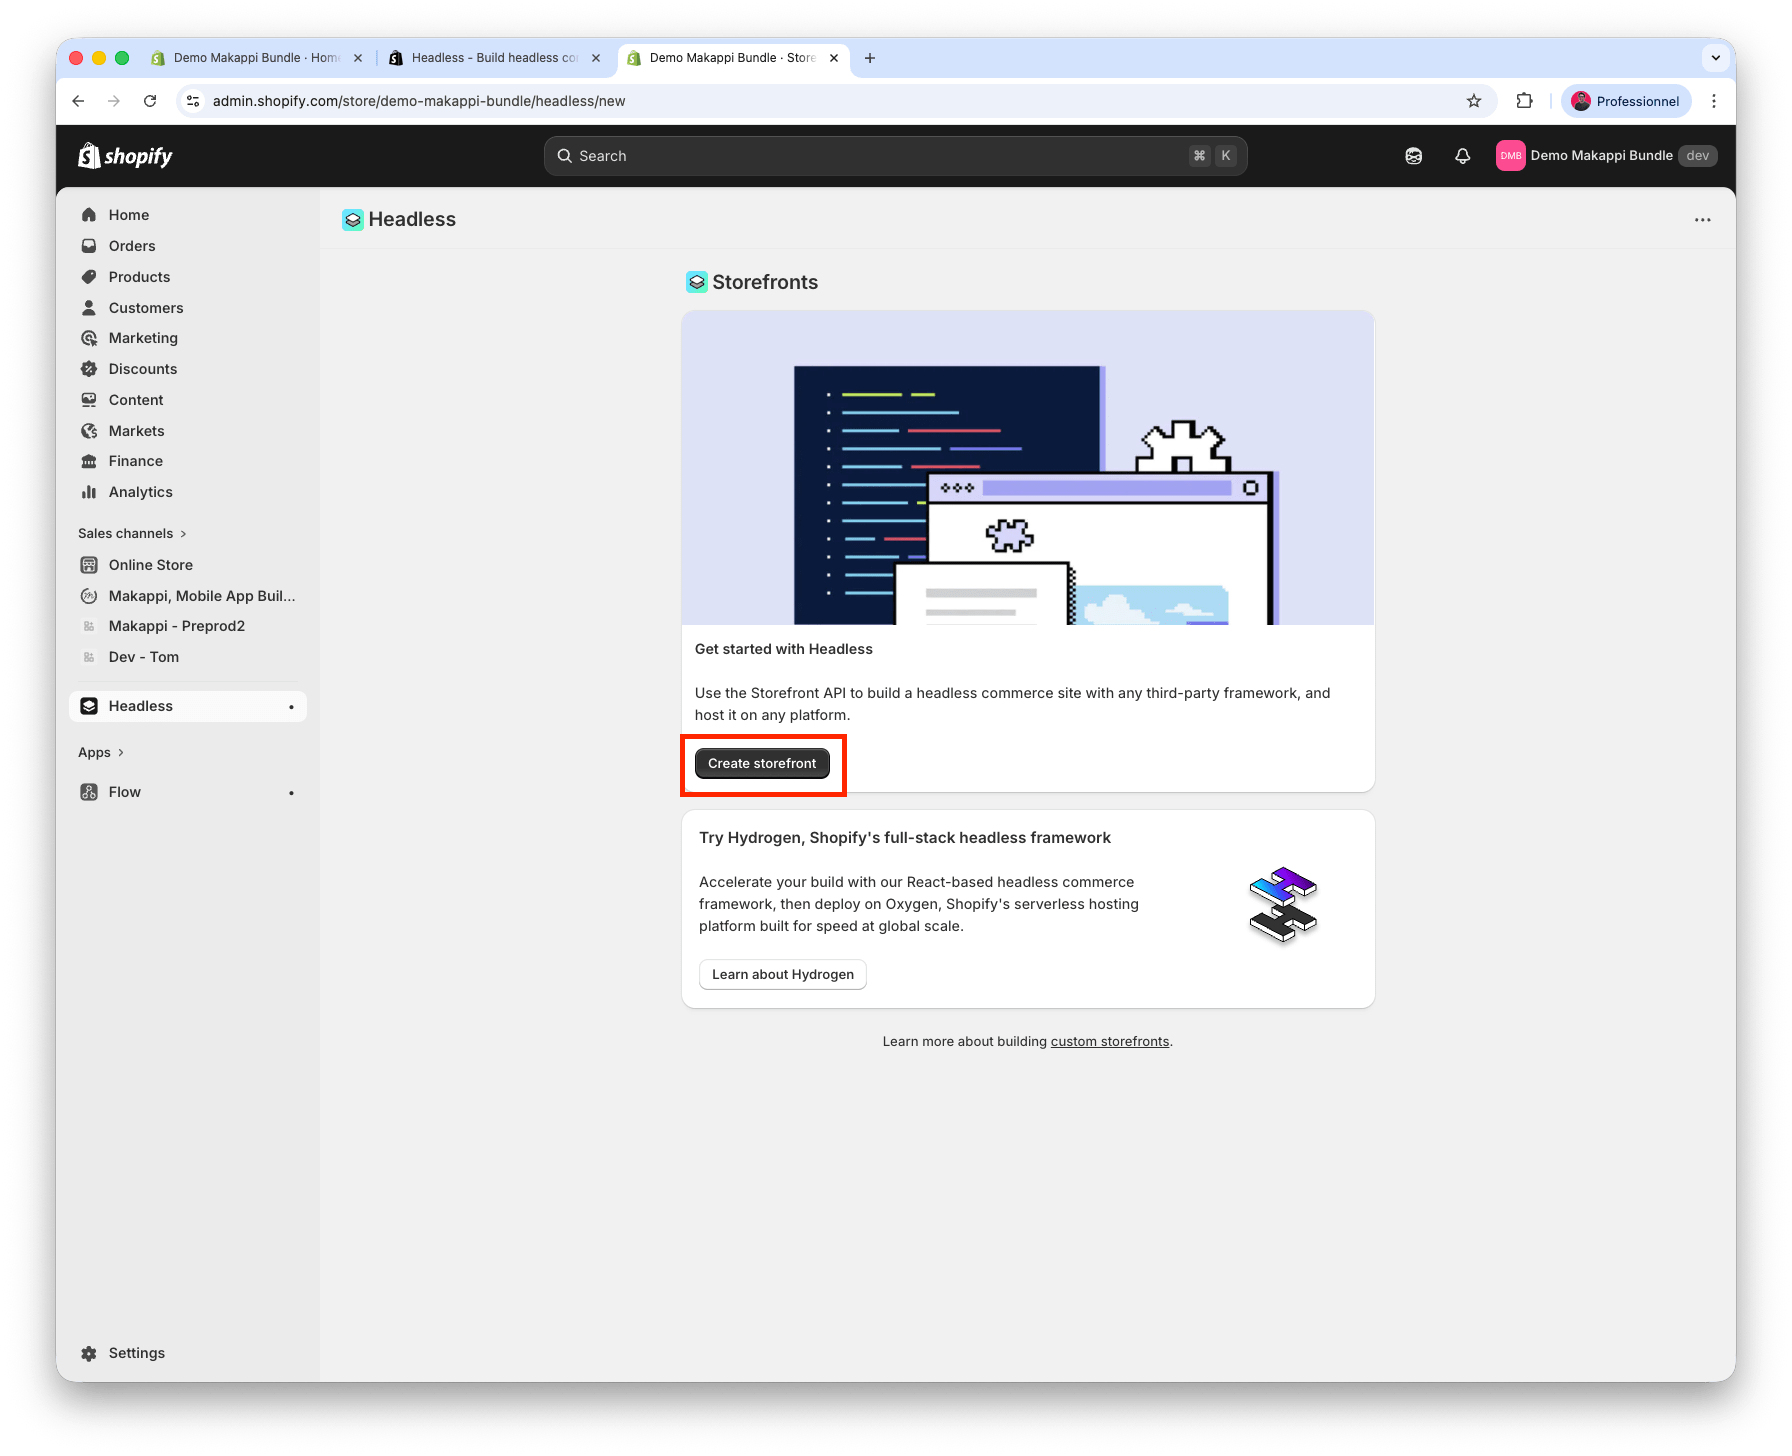
Step 2: Create a storefront
- Once the Headless app is installed, open it and click "Create storefront".
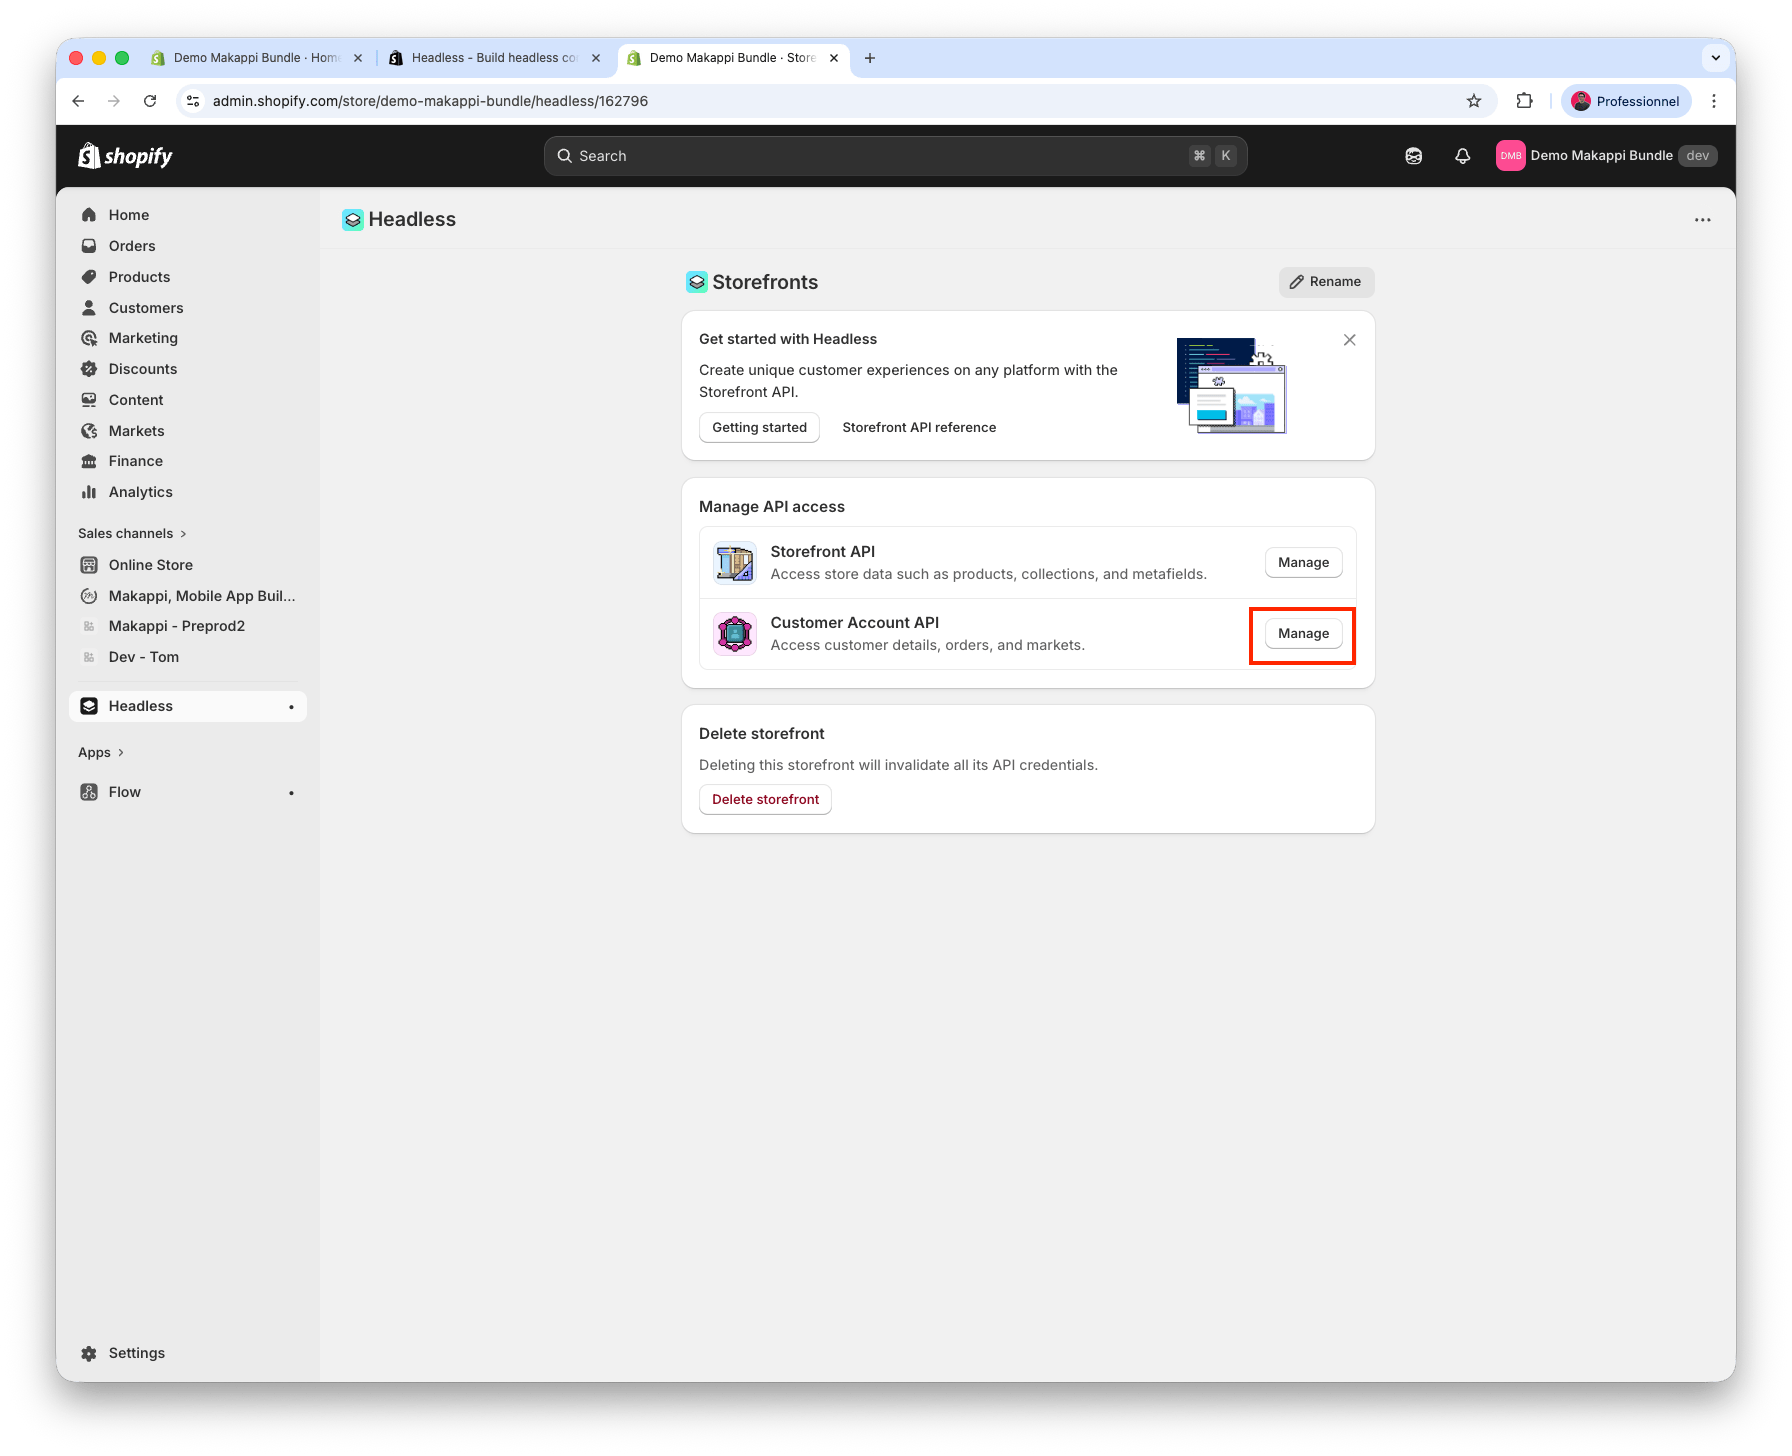
Step 3: Configure the Customer Account API
- In the Headless app, under "Manage API access", click "Manage" next to "Customer Account API".
- Change the client type from "Public (web app)" to "Public (mobile app)", then click "Save" at the top of the screen.
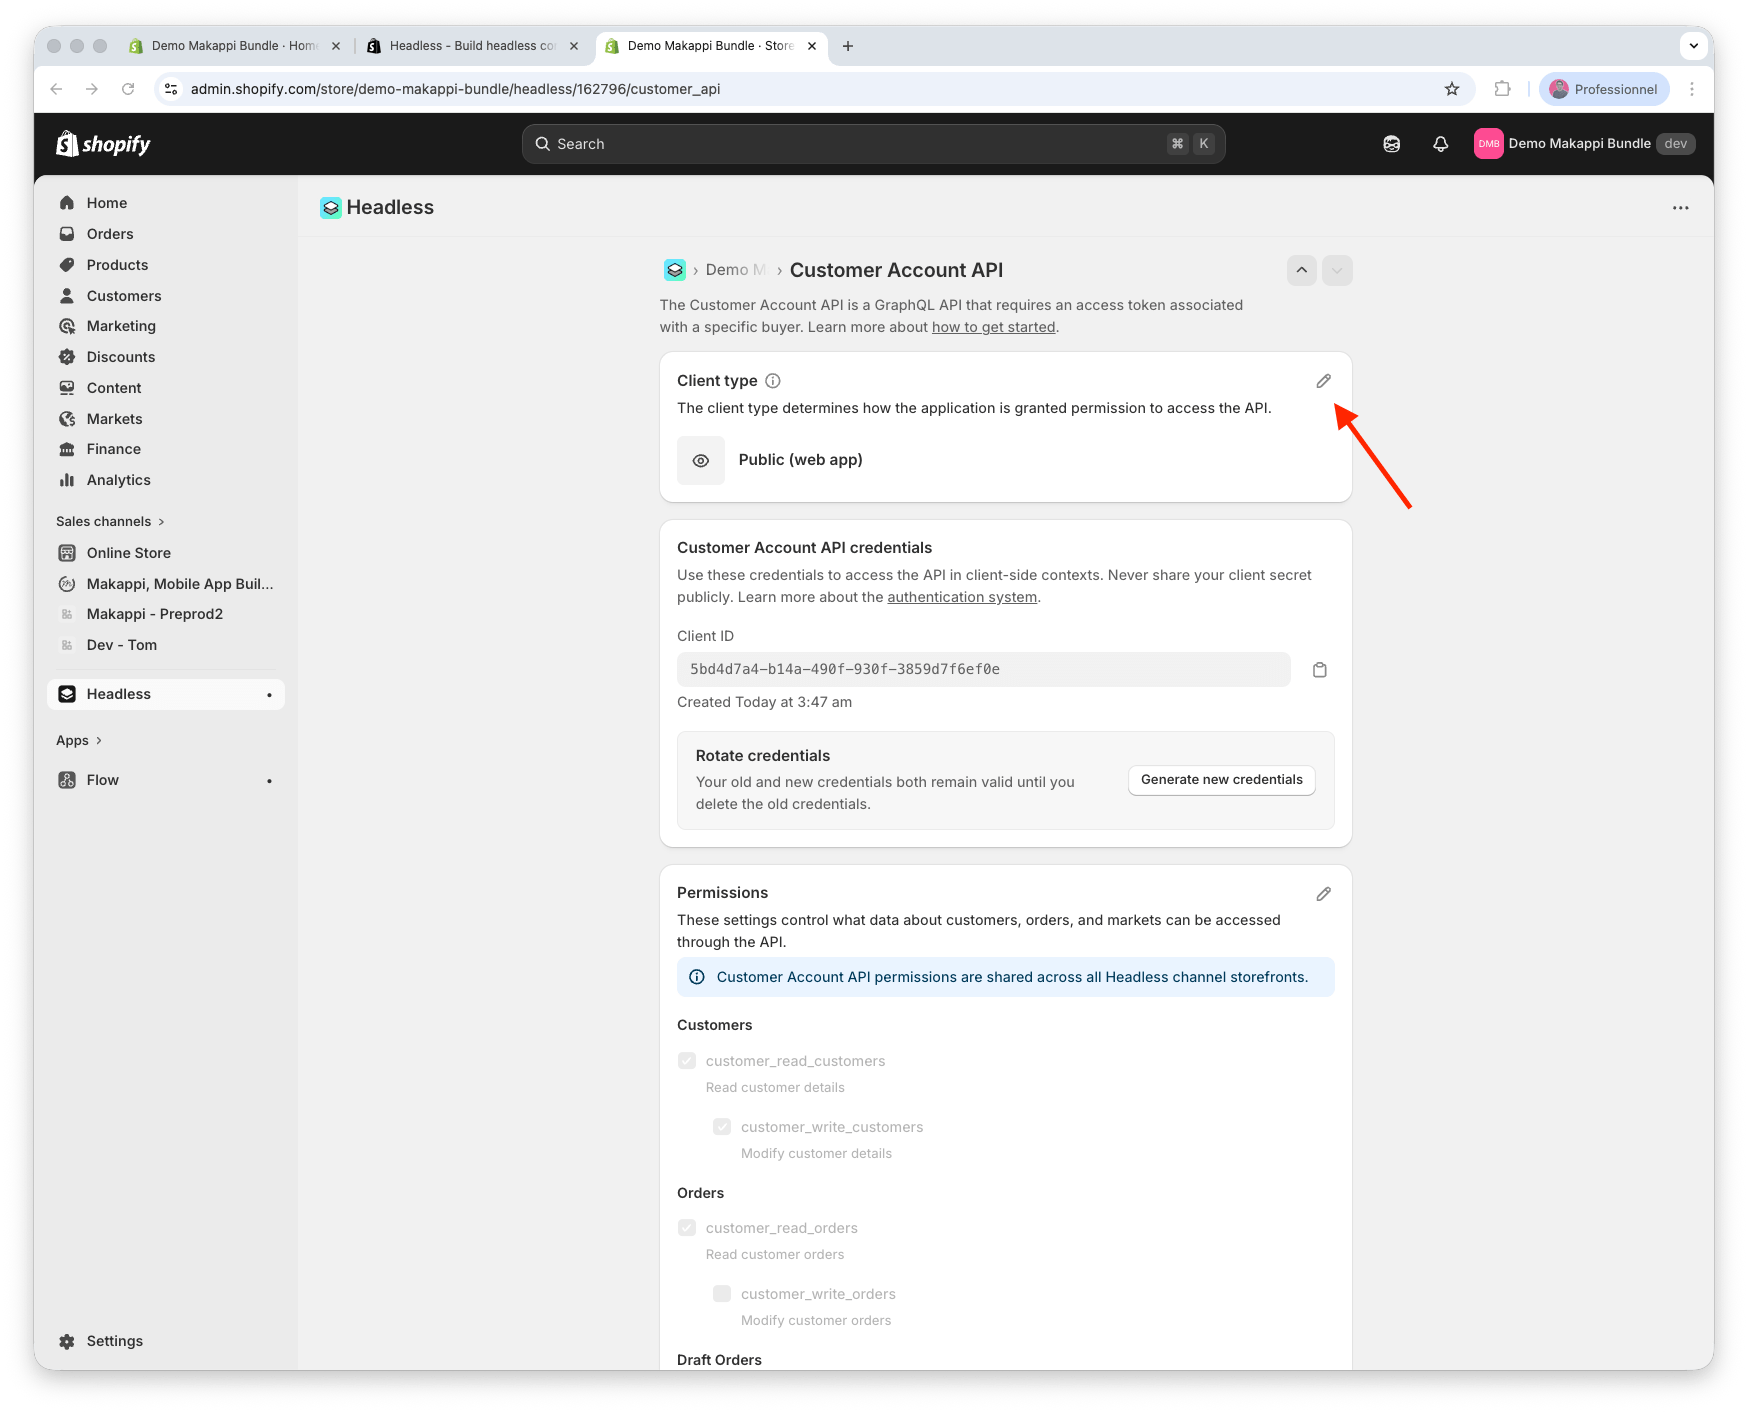
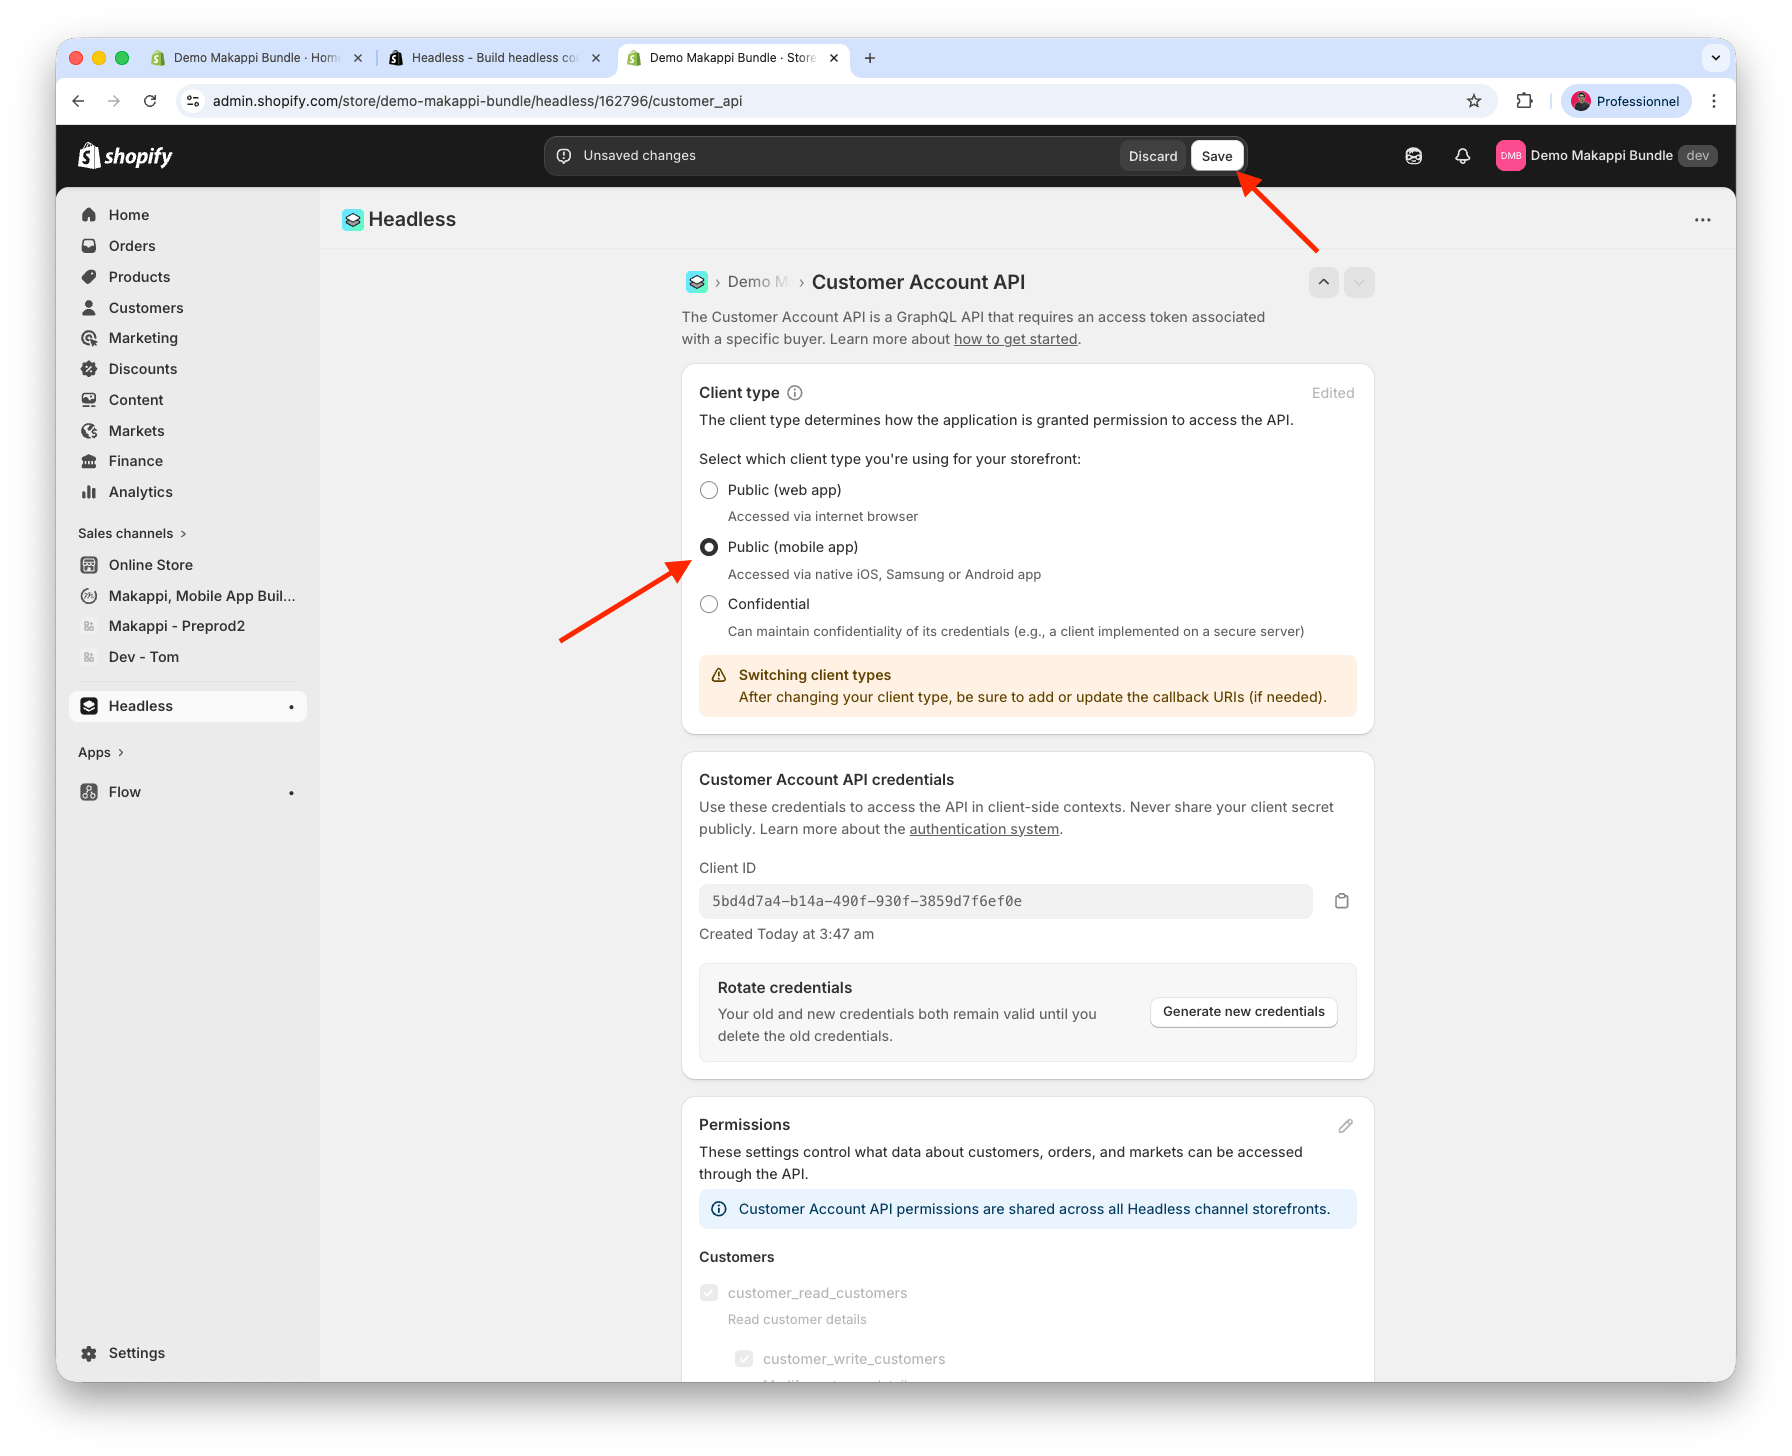
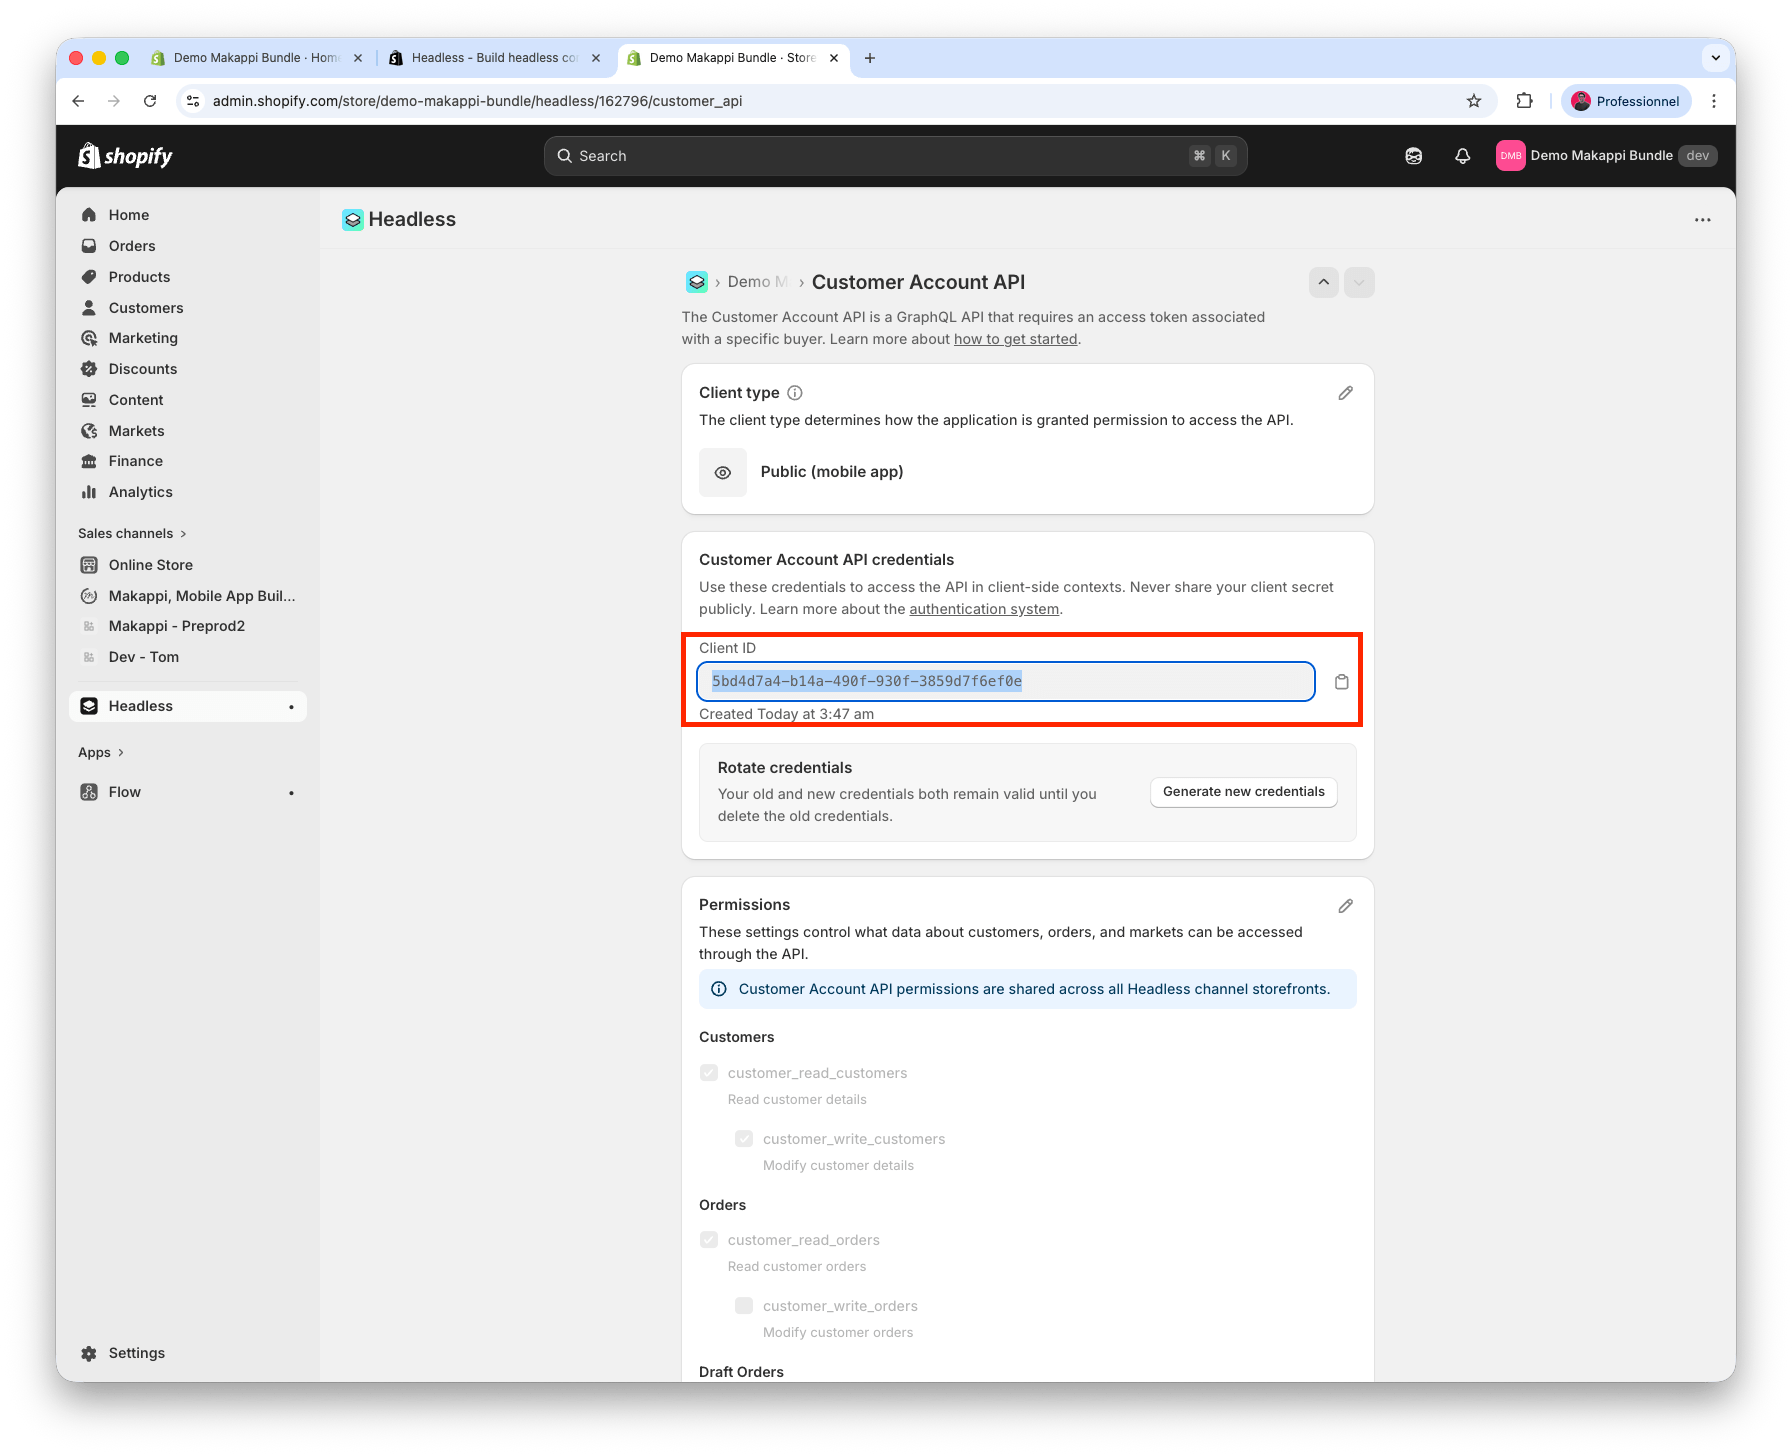
- Copy the Client ID displayed in the credentials section. You will need it in the next step.
Important: Do not uninstall the Headless app after this step. It must remain installed for the Customer Account API to work.
Step 4: Finalize in Makappi
- Log in to your Makappi dashboard
- Go to the "Design" section, then open the "Options" page
- Disable "Enable legacy customer accounts"
- Paste your Client ID in the designated field
- Publish your changes
Troubleshooting
- Verify that New Customer Accounts are enabled in your Shopify admin
- Make sure you selected "Public (mobile app)" and not "Public (web app)" in the Headless app
- Ensure the Headless app is still installed on your store